Amaranth Beauty is on Twitter!

Image

Hey, everyone! I am so grateful for each and every one of my new followers and I truly appreciate each of you! I wanted to let you know that Amaranth Beauty is now on Twitter…and as of right now has 0 followers! I am counting on you all to change that 🙂

Head on over to https://twitter.com/AmaranthBeauty and follow Amaranth Beauty for updates, notifications of the latest posts, images, and more! Just another way to reach out to people and get to interact with you all…I am really looking forward to this new dynamic and hope you all are on board to support it, too.

Tweet y’all soon, beautynistas!

The Importance of Being Earn–Er, I mean, Organized

I’ve said it before and I’ll say it again (likely many more times): beauty is fun. But you know what’s not fun? Having a heaping bin or drawer of products that you have to literally dig and sift through to find a particular item; slowing down your getting ready process because you can’t find your needed products; inconveniencing your significant other or roommates by having beauty products scattered all across the bathroom sink; not being able to achieve the look you want because you know what, you just have no idea where you put that red lip liner. None of these things are fun. Which is why, as a beautynista or even just as a woman who likes to get up and be able to find her products to get done up for the day, it is so important to keep our beauty products organized.

This may be the less fun side of beauty to talk about, but once it’s done it makes your life and your routine so much easier and you feel so accomplished. You can focus on getting your make up done, easily see what you do and don’t have, what does and does not need replenished and when, and what gaps you may have in your colorful collection. Knowing what you do and don’t have also helps you save money by keeping you from buying things which you really don’t need because you may already have something similar at home.

Whether you’re fairly organized and would like to get things in ship shape, or you’re starting with that dreaded overflowing bin of products and–admit it–you don’t even know what’s at the bottom of it, I have some tips and steps that have helped me and I think will definitely help you.

1. Come up with a system.

First things first: we’ve got to figure out how you’re going to do this. Are you going to use some sort of organizer, bags, baskets, jars, shelves, drawers? Figure it out now because you’ll need to either find the space for it or buy the appropriate tools (train cases, makeup bags, organizer valets, drawer dividers, etc.) to keep you organized. Next, think about how your mind works when you are getting ready or looking for something and what would be the best way to organize your makeup based on this. By color? By type of product? By frequency of use? Whatever you think is going to work for you, choose a system and keep it in mind throughout your process. I choose to organize mine by type of product: face products in one section, eye products in another, lip products in the third, and finally, a section for beauty tools. I find this the most practical way to do it because that’s how my mind functions: working on one feature at a time. Just choose the system that works best for you!

2. Buy What You Need

Next up is the crucial step we talked about in step one: buying or finding what you need to make this happen. Whether you use the shoe boxes sitting in your closet as drawer separators or you head out to the store to pick up a classic train case or valet, now is the time to gather these items so that your newly sorted makeup has somewhere to go right away. There are a lot of options on the market as far as keeping your makeup organized. Personally, I think train cases and fold out valets are really great options. Although valets are generally marketed for keeping toiletries organized while you travel, they’re actually an amazing option for keeping your makeup organized at home. I use one for the makeup I use more commonly and often, whereas I keep the rest in a train case. There’s tons of good options on the market, so below I have a few ideas for budget friendly cosmetic organizers to get you started in the right direction!

Hard Cases

Clockwise from Top:

Soho Tech Savvy Case – $29.99

Clear Organizer Tray – $10.99

Pink Caboodles Classic Case – $13.99

e.l.f. Large Make Up Separator – $15.00

Professional Train Case- $44.99 ..a bit more of an investment, but from someone who owns this product, it’s definitely worth it. Think about the use you will get out of it!

Soft Cases:

Sonia Kashuk Valet Cosmetic Case – $29.99

Contents Garden Variety Cosmetic Valet – $19.99

Contents Blue and Green Weekender Case – $24.99

Caboodles Letter Printed Cloth Organizer – $24.19

3. Sort it Out, Throw it Out

Okay it’s time to go through what you have. Let’s just get it over with, like ripping off a Band-Aid. Dump out the contents of that unsorted bin, empty the contents of the bathroom drawers, tip over your make up bag. It’s time to sort.

A few things to keep in mind: Take stock of what you have while you are doing this. Now is the time to take a look, while it’s all out in the open. You will realize just where that red lip liner did go and maybe that you have four gray eye shadows which are pretty much the same shade and you need to stop purchasing those. Not that that’s ever happened to me.

Next: Sort things now based on the system you devised earlier. The products don’t have to go right in the organizer right now, but definitely start separating them on the counter, the floor, the table, whatever surface you are using here, either by color, product type, etc.

Finally: Now is the time to clean house. Throw out anything that is expired, gunky, miscolored, or which you have not or will not use. Some guidelines: Mascara only lasts about 4 months, so use it or lose it. Lipstick, lip liner, and powder products usually have about two years in them; eye shadows and eyeliners, three years. Lip glosses definitely depend on the formula. Keep an eye on it and use good judgment! Nail polish technically has about one good year in it, but some can be stretched longer. If it seems funky, trash it! And be realistic about what you need. The rainbow tropical colors eyeshadow palette seemed like a great idea at the time and some people have all kinds of use for that, but if you’ve literally never used it, chances are you won’t. And that pink chunky loose glitter from Claire’s? Sure it’s still “good”, but you bought that in high school…get serious.

4. Drumroll, please…time to organize!

Go ahead, get your things organized. Choose a compartment for each and organize accordingly. Try to keep things in one layer so you can see everything you have. Arrange in your pockets, drawers, or compartments in a way that everything is easily accessible and viewable. Now is the time to put to good use whatever organizers you purchased earlier! Here is how my recently organized pile of cosmetics turned out:

As you can see, the valet system works out really well because each type of product has its own pocket, and I can hang it on the back of my door and easily access all my products. I definitely recommend taking a look at these when you are out shopping for your organizational tools.

And finally…

5. Revel in your newly organized cosmetics…but keep it maintained.

Go ahead. Take the time to feel accomplished. You just sorted through your droves of cosmetics and assembled them into an organizationally sleek, easy to use set up. You deserve to feel great about this. But one of the most important things to keep in mind is to now maintain, or all your hard work will be for nothing. Wherever you get something from, put it back there. Don’t get lazy and start tossing things wherever or scattering them across the sink again! It will only work if you keep it working. If you stay organized, you can focus on the important things…using the makeup in those pockets and compartments, buying new things, and having fun!

Happy organizing, beautynistas!

Wisdom from Ke$ha

Okay, so this isn’t exactly a title or headline you would typically expect to see. Catchy party music and perfect getting ready jams aside, Ke$ha is not exactly the world’s greatest philosopher or anything. BUT, she is beautiful and I had to give the girl major credit when I ran across this little quote:

“I just like playing with makeup and clothes–so I really don’t feel like there are rules; and if there are rules, then I think it’s up to you to break them.” -Ke$ha

Well said, I think. Maybe we are not all going to go out in blue lipstick and with glitter lightning bolts painted over our eyes tomorrow, but I hope this sentiment reminds everyone that beauty is supposed to be FUN. Not stressful and about draining your wallet. It’s an amazing art and really fun form of self expression, and let’s not lose sight of that. 😉

Image

[photo credit]

Budget Beauty Shopping Tips

1. More expensive does not always equal better.

Image

Budget beauty-nistas know know it’s not about the number on the price tag. Just because something costs more doesn’t mean it is automatically better. This is another one of those common misconceptions society has impressed upon us…that lots of money=better. You can get perfectly good products while still saving money! There is nothing wrong with inexpensive beauty products, drugstore brand names or even generics, and don’t let anyone tell you otherwise!

2. Be choosy

Image

I’m tempted to heap every single thing on the shelf into my shopping basket sometimes, too, but it’s just not realistic. Even though you can get great products for cheap, keep in mind that not all products are created equal. Go ahead and read the ingredients, hop on Google on your phone and check out some product reviews, or compare similar products and find what will work best for you. It’s your money, so spend it wisely!

3. Shop like you’re on a tight budget, even if you’re not.

Image

Sometimes when we do have extra spending money and can afford to buy lots of new products, we fall into the trap of spending indiscriminately. I’ve done it–I know all about it. But it’s not always the best way to go for either your budget or your beauty product collection. I find that when I have a very small amount of money to work with, I’m much more budget-conscious and choosy about which products I buy (as seen in rule number two). I read ingredients, compare carefully, and don’t necessarily grab the first thing I see. I take a look and make sure it really is a good value. How much of this product am I getting for my money? How much use will I be able to get out of this? Is there another brand that does the same things or offers the same benefits for less money? It may sound silly, but I find that if I pretend I’m tight on money and don’t have the luxury to spend, I will be much more careful and make sure I am getting good quality products for a good price. Consider only heading to the store to shop for makeup with a certain amount of cash, and not allowing yourself to go get more from the ATM or swipe your card. That way you limit yourself to just what money you have and more carefully consider your purchases. It sounds silly, but it works!

4. Know what you already have.

Image

This is very important. Know what you already do have and don’t have in your beauty stash before you head out shopping. Part of this is keeping your collection well organized and visible, which is a topic in and of itself which I will address! But there’s nothing like spending money on an eyeshadow palette and getting it home only to realize that you already have eyeshadow singles in shades remarkably similar to three of the shades in the palette. It’s incredibly disappointing and a waste of money which you could have spent on something you didn’t already have or which would have diversified your beauty stash much more. The way to avoid this is to know what you have so you can make smart shopping decisions, get the most bang for your buck, and also keep your go to essentials replenished as needed.

5. Sometimes you just have to try it.

Image

It seems a little counter intuitive to tip four, but sometimes it is worth it to take a chance on something. If you have a few extra bucks, give it a shot! You never know what you’ll find that may be your new favorite product or maybe even works better than something else you have tried before. One of my absolute favorite products is a little jar of rose silver all over shimmer powder by Payless Shoe Source’s cosmetics line, Unforgettable Moments. I picked it up on sale for one dollar while out one day, figuring, hey for one dollar it’s worth it. If I love it, I got an awesome product for cheap. If I don’t love it, at least I only spent a dollar on it! It turned out great! It’s the perfect shade, not too shimmery, and just a touch of color and shine to brighten up my face for going out or just glamming up a look a little bit. Wen prices are like that, these are the chances we have to sometimes take to find new little gems that could end up saving you money in the long run–a new budget beauty find.

6. Think outside the box.

Image

Don’t limit yourself just to the beauty aisles at Target, Walmart, CVS, Rite-Aid, etc. Branch out a little and don’t be afraid to think outside the box for budget beauty options. Consider home delivery options like Avon for good buys–their sale catalogs can have incredible deals and their regular catalogs are also a good source for high quality beautiful essentials as well. I’ve found quite a few lovely eyeshadows and colored glosses. They’re also a good option for fragrances.

Also consider great online sources like e.l.f. cosmetics at www.eyeslipsface.com for extremely inexpensive deals, frequent, sales, and wonderful gift sets (and there’s nothing wrong with gifting yourself a little something). e.l.f. is a fantastic resource for tools and brushes as well as stocking up on colorful cosmetics and trying new things (a great place to experiment because their prices are so affordable). Another good online resource is the classic drugstore.com who have reliable prices and surprisingly good sales and special offers.

Finally, another underestimated budget beauty resource I just have to include: Sally’s Beauty Supply. Do not fear the red canopied stores! Too many consumers think Sally’s is exclusively for beauty professionals or that their high quality products will come hand in hand with high prices–neither of which are true! Sally’s is there for you, for me, for all of us–they are open to the public! Additionally, they have an incredible selection, good quality, and reasonable prices. Plus, for a real bargain, shop their Sally Girl line for small but amazing goodies like highly pigmented baked eyeshadows, super smooth lipsticks, and trial size nail polishes all in the range of one dollar–sometimes less!

This concludes the budget beauty shopping tips I have for all my fellow product lovers. I hope you like them! Feel free to share your thoughts or any of your own beauty shopping tips and tricks in the comments!

10 Beauty Essentials Under $10

So it’s been quite some time since my last post, for which I sincerely apologize…and you certainly won’t see it happen again. ;-). But to make up for it let’s take a look at not one, not two, but TEN great products on a top ten list of beauty essentials…all for under ten dollars for us budget beauty-nistas! Read on for ten under ten…in no particular order!

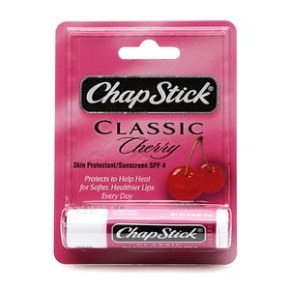
1. Cherry Chapstick – $1.99

Image

                          [photo credit]

 Let’s face it–Chapstick is an absolute classic. And nowadays, the sweet, fruity cherry variety is immortalized in Katy Perry’s breakout bi-curious hit, “I Kissed a Girl”.

But all jokes aside, its reputation is for good reason. Chapstick is my absolute, number one, if-you-were-stranded-on-a-desert-island-and-could-only-bring-one-beauty-item must have, and cherry is my favorite. It’s rock-bottom cheap, glides on smoothly, and keeps lips hydrated and protected. I live on this stuff and never have chapped lips, even in winter. On top of that, Cherry Chapstick is the quintessential “no-makeup makeup”–just a smudge of barely there color and hydration, and your no makeup day feels a little more polished. Some days, even a beauty junkie just needs a little mascara and Cherry Chapstick.

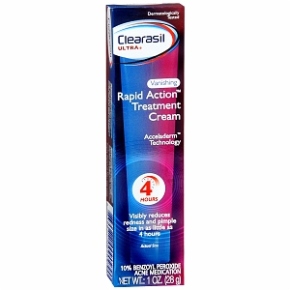
2. Clearasil Ultra Rapid Action Treatment Cream – $9.99

Image

                           [photo credit]

Not to sound like a ProActiv commercial, but let’s face it–we all get pimples sometimes. It’s not the end of the world, but it screws up your day a little when you wake up with a whopper on your chin. Ugh. Clearasil Rapid Action Treatment Cream is there for these little monsters, and has a simple mission: “Visibly reduces redness and pimple size in as little as 4 hours.” It doesn’t claim to do anything crazy or promise you miracles. It just makes a bad situation better. And really, isn’t that what we want from anything?

Best of all, it really does do what it promises to do. It dries them out and gets you on your way to clearer skin and an improved look very quickly. With repeated use, it boots those little moochers to the curb. Just be careful and make sure you put it only on he pimples–it can be very drying to surrounding skin. This one is pushing right up against the $10 mark, but it’s 100% worth it.

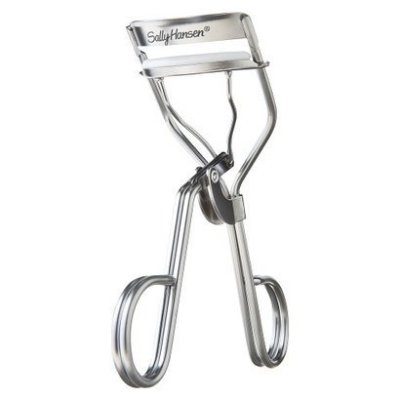
3. Sally Hansen Beauty Tools Open Your Eyes Classic Eyelash Curler – $2.89

Image

                                     [photo credit]

I’m a big believer that curling your eyelashes really opens up your eyes, makes lashes look longer, and just gives that little extra oomph to any eye look. But do you want to go drop a fortune on an eyelash curler? Probably not, and the good news is, you don’t have to. $2.89 is nearly unheard of for a great quality tool like this, but sure enough you can pick up this beauty for under three dollars at a local Target or Walmart, and it even comes with one refill pad to get you on your way to healthy beauty supply upkeep. This curler fits lashes perfectly gives a beautiful curl in seconds.

A little eyelash curling tip: Run your curler under hot water for a few seconds right before curling; wipe of the water and then immediately curl lashes The warmth retained in the metal adds a little extra curling and staying power–the equivalent of wrapping hair around a hot curling iron. Some people suggest blow drying their curlers for this same effect–resourceful, but it gets the metal very hot, very quickly, and do you really want to risk putting it near your eyes? I recommend against it, but the hot water trick is more convenient and also safer!

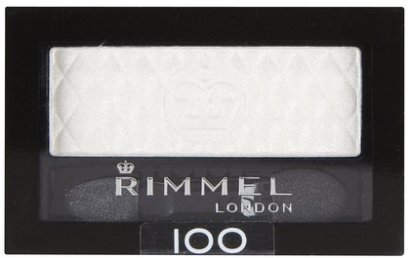
4. Rimmel London Glam Eyes Mono Eyeshadow in Glam Ice- $4.49

Image

                                [photo credit]

I’m not going to suggest we go back to the days when I was in 8th grade and the other girls in my class caked their lids with white shadow so thick you could see the height of it actually coming off their lids, but white eyeshadow can be a game changer when used correctly and applied well. I use Rimmel London single eyeshadows in Glam Ice–a little shimmery white on the inside corners of the eye wakes up your face and makes your eyes look sparkly and pretty. I usually brush some on my browbones as a highlighter, as well. This shade is the best becase it’s a true, pure white with just a little bit of shimmer, not chunky glitter. Perfect balance!

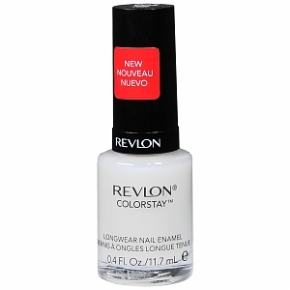
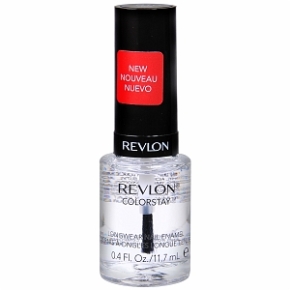
5. Revlon Longwear Nail Enamel Base Coat and Top Coat – $7.99 each

Image

                            [photo credit]

Image

                             [photo credit]

So I’m a bit of a nail polish junkie. I may or may not be running out of room to store all my bottles. What can I say? I love color! I’ve been painting my nails regularly for 10+ years now, and I’ve learned a thing or two. One of those things is the utmost importance of not just a top coat, but also a base coat. It’s definitely important to have a good quality base and top coat, and Revlon offers just that in their long wear line of polishes. I stumbled upon these two gems when I was on the hunt for a good base and top coat pair one day. I’d switched several times and just hadn’t been delighted with any of them–until these! Both go on smoothly and evenly with wide, double brushes that distribute a nice coat in just two strokes. The base coat provides the ideal foundation and leaves you with no staining whatsoever, even with my affinity for neons and dark colors (black is one of my faves and never a stain in sight). The top coat delivers a gorgeous shine and long wear protection which helps my manis last the whole week.

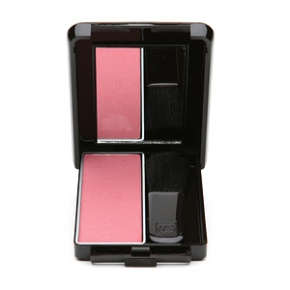
6. CoverGirl Classic Color Blush – $5.49

Image

                           [photo credit]

This one lives up to its name–it’s definitely a classic. It’s an inexpensive, smooth, easy to apply powder in a selection of flattering colors from a trustworthy name that’s been around for years. This is perfect for an everyday blush! I use Rose Silk almost every day and it looks great on its own or layered with bronzer. If you’re seeking a good go-to, I highly recommend it.

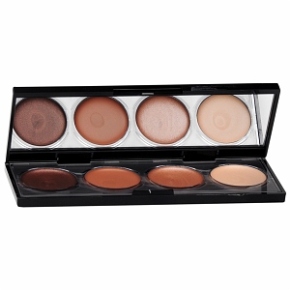
7. Revlon Illuminance Creme Shadow – $6.50

Image

[photo credit]

Cream eyeshadows are fabulous. They’re perfect for a rushed morning and can be easily applied with just your fingers, blended, mixed–you name it. They’re practically fool proof and give the perfect combo of lightweight and shiny meets wash of pretty color. Eyeshadow palettes are another of my favorite things because you get a great set of colors in one convenient package. I’ve found this one of the most practical beauty buys one can make. For cream shadow palettes, I turn again to trusty Revlon. I’ve been using Revlon Illuminance Creme Shadow palettes for years now and love them just as much as when I first picked one up because I simply liked the colors! Each comes with four colors which go perfectly together and can be blended and used to create pretty, dynamic looks. Everything you need is right there, and unless you really apply with a heavy hand, this cream rarely creases or runs in warm weather. Check out the color choices and I guarantee you’ll find one you love. Might I suggest Wild Orchids, Not Just Nudes, or Precious Metals?

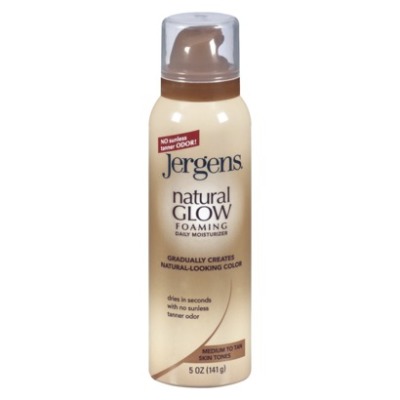
8. Jergens Natural Glow Moisturizer – $7.89

Image

[photo credit]

Jergens Natural Glow Moisturizer and it’s facial moisturizer partner in crime are each just under ten dollars. These moisturizers garnered a lot of attention when first debuted, and it was well worth it. They’re a great way to get a gradual sunkissed look any time of year. They’re a lot easier to handle than self tanners and don’t look fake and orangey at all. Just be sure to wash your hands after using! A lot of imitations of this product have come about in the past couple years, but I still rely on the original Jergens–I know for sure it works great and looks great. Plus, it isn’t stinky or strong smelling like some lotions and tanners. I’ve always thought it smells like a combination of the beach and buttered popcorn. Odd…but yummy.

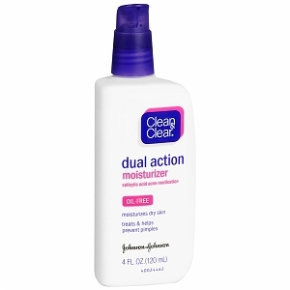
9. Clean and Clear Oil Free Dual Action Moisturizer – $6.59

Image

            [photo credit]

Face moisturizers, overall, are a tough call. What will give you enough moisture to keep your skin healthy and glowing but not be so heavy that it will make you break out? The answer is this: Clean and Clear Oil Free Dual Action Moisturizer. If you’re stuck between this age old rock and a hard place, give it a shot…you won’t be disappointed.

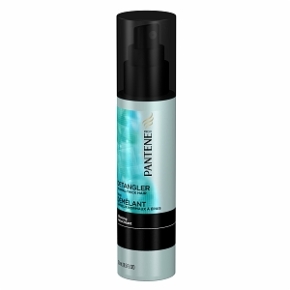
10. Pantene Pro-V Normal to Thick Hair Solutions Silkening Detangler – $3.99

Image

                          [photo credit]

Best for last? Maybe. Little kids aren’t the only ones who need a good detangler, but those adorable bottles adorned with pictures of fish won’t cut it for all adult hair. Just to be up front and give you some context for this, my hair is a nightmare. It’s really long and extremely thick with a naturally wavy texture. My best friend refers to it as a horse mane. It’s worth it once I can get it tamed because it does look pretty and gets compliments but none of that would be possible without Pantene Pro-V Detangler.

Like the detanglers of your childhood…but heavy duty. This spray has an almost creamy texture and can conquer even the toughest of knots. It makes hair silky and manageable. Trust me, if it can tame my horse mane, there’s a great chance it will help you out, too! Spray all over hair after washing and comb through. You can also spray directly on knots which helps them loosen up with combing, or use to touch up shininess on dry hair (if used sparingly to avoid a greasy look). One of the most worthwhile purchases I’ve EVER made, and a definite can’t-do-without for my beauty stash.

There you have it–10 amazing budget beauty essentials under 10 dollars. Of course, prices at your local stores may vary slightly, but you will still be getting a great deal! These are just some go tos to get you started thinking about them and maybe find some new faves…there are so many other amazing products to discover! Stay tuned for other fantastic beauty products and ideas, and feel free to comment with your favorite under $10 beauty essentials.

Adoration

There are many facets to my personality, but one which has always stood out is my adoration of beauty and cosmetics. I remember starting out as a fresh faced preteen with my Art Stuff Shimmer Palettes from Bath and Body Works and my Dr. Pepper Bonne Bell lip balm (remember the lip balm necklaces and key rings?) and just being positively enamored with all the jars and bottles and tubes and pots and beautiful colors with captivating names like Dusty Rose, Ballerina Slipper, and Autumn Sunset.
Back then I was drawn more to chunky glitter and metallic lilac, and though I’ve come a long way since then, some 13 years later I am just as enamored with beauty as always…some things never change.
Inexplicably drawn to the “Health and Beauty” aisles of any department store and prone to poring over the endcaps and everything in between at my local drugstores, I’ve found myself contemplating a different side of the beauty fascination: the monetary side.

It seems there is a bit of a stigma in society in general that money equals beauty, and without those big bucks you won’t have nice skin,  the perfect smokey eye, or a stunning red lip. I love a good glossy magazine and you’ll find stacks of the gorgeously produced and masterfully edited publications all around my house, guaranteed. But so often I find myself shaking my head over the pages as they recommend hundred dollar eyeshadow palettes or glosses which cost as much as a tank of gas. I have the utmost respect for both the beauty editors at these mags and also the cosmetic companies which have built empires worshiped by thousands of women but let’s be real with each other for a moment: we don’t all have that kind of money.

Whether you’re a struggling college student, a working mom, just starting out, or just an incredibly budget conscious individual, I’m creating this blog for you. I know how you feel and I know what it’s like to be a self-proclaimed “beauty junkie” with a limited pocketbook. But you shouldn’t have to give up what you love just because you’re not made of money or because you have your spending priorities in line. If creating different looks and expressing yourself through makeup is important to you, these things do matter. And if it makes you happy, you should do it.

I’m sure some people will say it’s frivolous or there are better things to worry about, but I think there are enough girls and women out there who know that when you have ten dollars to spend on makeup, you want to be sure you don’t drop six of it on an eyeshadow palette that’s going to shatter within ten minutes, get everywhere and translate poorly from package to face. I’ve been there.

So, tangental beauty rant aside, welcome to my new blog! I hope all you other budget beauty junkies will come along with me on this journey to show that you don’t have to dish out major dough to create a great look or get good quality products. Come along with me for product reviews, looks within your budget, suggestions, tips, color combos, and more. I’m excited to blog, share, and discuss with all of you, be it beauty or whatever related topics come up (cute winter jackets? yoga? best kinds of tea? Hey, I’m game!).

Feel free to share thoughts in the comments! I love a good discussion, but be nice, and remember you get what you give. 🙂